Saturday, January 31, 2015

card 4 from the Stamps in the Mail Kit

Card 4 uses the following supplies: Same stamp set and thinlits. Crumb Cake, Whisper White, and Blushing Bride cardstock. Rose Red and Wild Wasabi markers (marker to stamp technique used). Crumb Cake and Rose Red inks. Other supplies used: 1/4" Blushing Bride cotton ribbon and Pearls.

Friday, January 30, 2015

Card 3 from the February Stamps in the Mail kit

It seems some of my scheduled posts are posting out of order. I am away at the Stampin'up! Leadership and tried to keep things going. I am sorry for the mixup. Card 3 uses the following supplies: Same stamp set and thinlit dies. Coastal cabana and Whisper White cardstock. Mossy Meadow and coastal Cabana ink. Pearls are also used.

Thursday, January 29, 2015

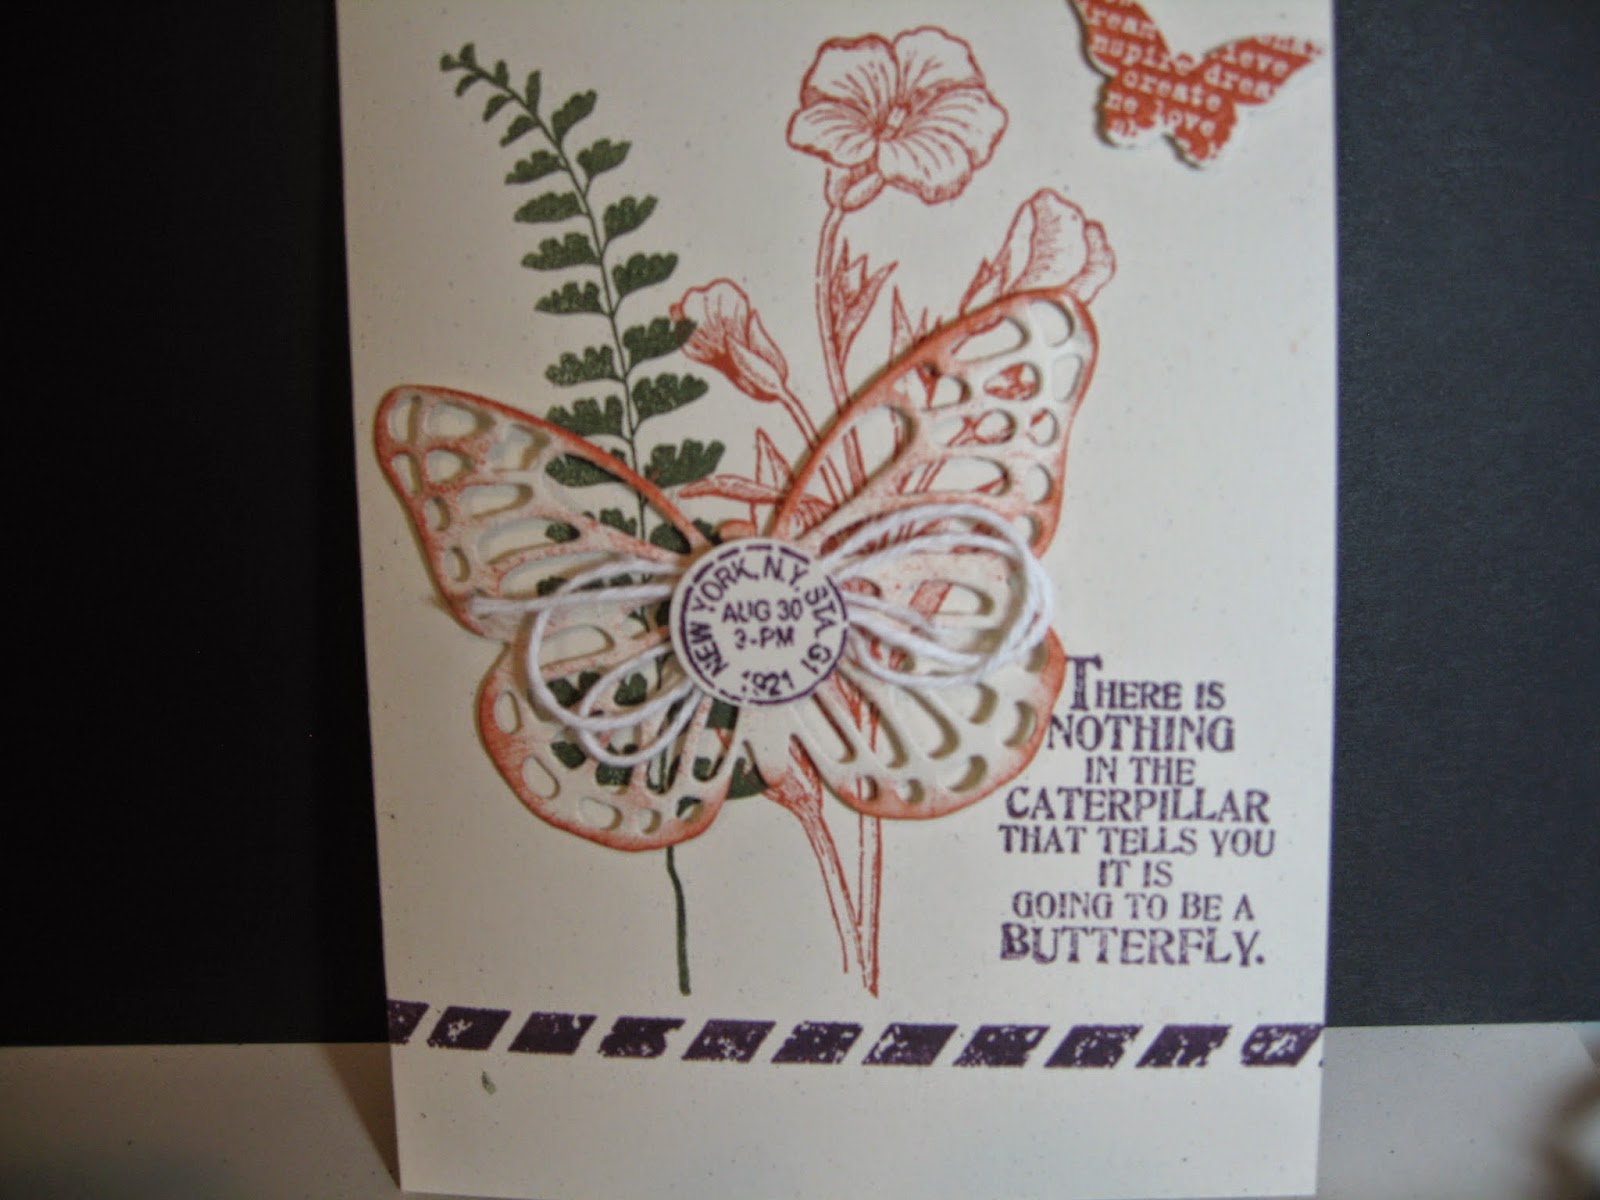
Butterfly Basics card #1 for February Stamps in the Mail Kit

This is the first card in my February Stamps in the Mail Kit. Kits are still available to order. Supplies are as follows: Butterfly Basics stamp set, Butterflies Thinlits Dies, Naturals Ivory cardstock, Mossy Meadow, Tangelo Twist, and Blackberry Bliss inks. I also used sponges, Basic Butterfly punch, 3/4' PUNCH WHITE BAKER'S TWINE, and stampin dimensionals.

Wednesday, January 28, 2015

Butterfly Thinlits Dies

I'm sure you have seen the trouble we have with some of the thinlit dies. The cardstock gets stuck and rips before we can get it out of the die. Several of our talented demonstrators have video's using 2 dryer sheets that help with this problem. Take your two sheets and fold them in half. Then using the bigshot and both tabs run the die through on top of the dryer sheets. This creates a film on the die that does not hurt the cardstock but allows removal much easier. Love it!!

Tuesday, January 27, 2015

Card #2 for February Stamps in the Mail Kit

Card 2 uses the following supplies: Butterfly Basics stamp set and thinlits. coastal Cabana, Whisper White, and Daffodil Delight cardstock. Painted Blooms Designer Series Paper from the Occasions catalog, and Best Year Ever DSP FREE from the Sale-a-Bration catalog. Other supplies are the yellow button, also FREE, from the SAB catalog.

Last two page toppers

These are the last two toppers for The Perpetual Calendar kit. It was a fun project and will be a super cute gift to that special someone.

Monday, January 26, 2015

2 toppers today since I missed yesterday

2 more pages from the Perpetual Calendar kit. These make wonderful presents, not too early to be thinking about Christmas gifts for friends and family.

Saturday, January 24, 2015

black 11 x 17 stampin mats

I am looking for 6 of the hard black 11 x 17 rubber mats Stampin'Up! sold several years ago. Any help will be appreciated...and you can bring them to Leadership if you are going, or to Convention this summer.

Friday, January 23, 2015

The Perpetual Calendar Kit - August

August, the end of summer....but this page topper has some sparkle.

Thursday, January 22, 2015

The Perpetual Calendar kit - July

This is the page topper for July. You can still order this Calendar kit from the Occasions catalog.

Wednesday, January 21, 2015

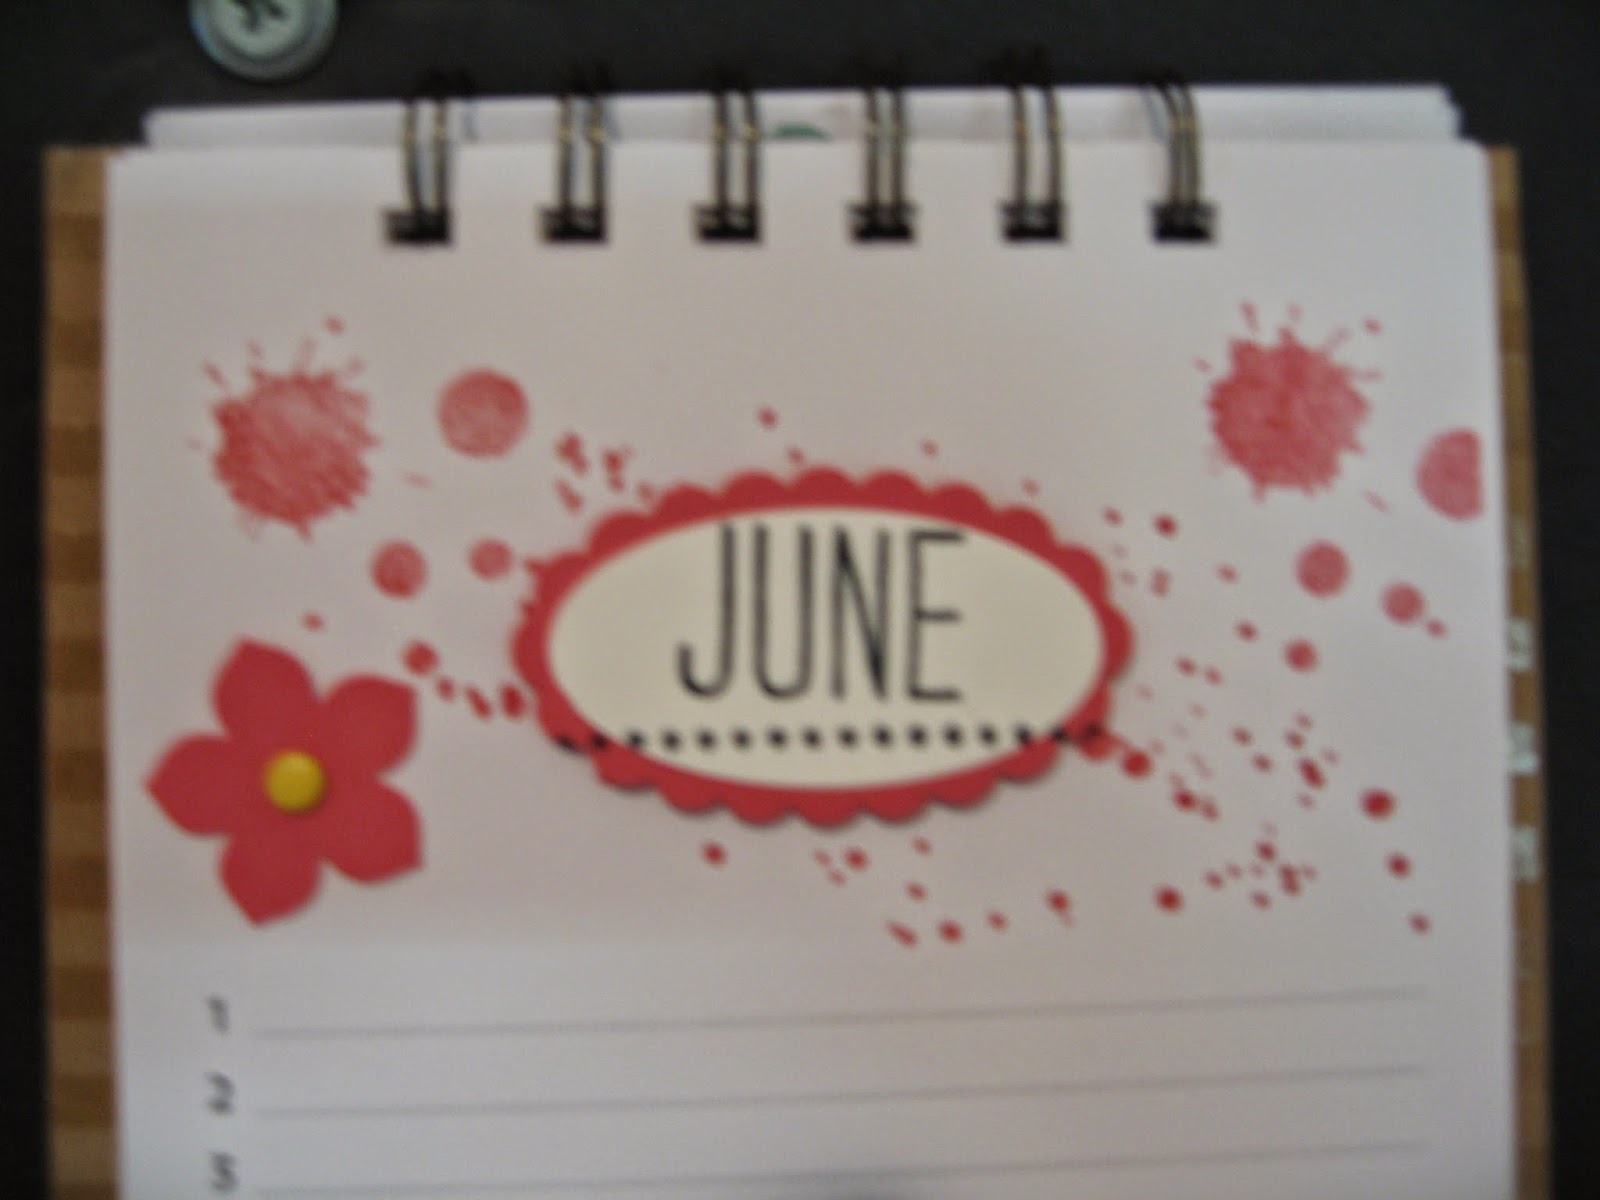
The Perpetual Birthday Calendar - June

The June page for the Calendar. I used the scalloped oval punch and the oval punch for the month name.

Tuesday, January 20, 2015

The Perpetual Birthday/Anniversary Calendar - May page

I've been saying Birthday calender but you also put anniversaries, special happenings in your family/friends circle that happen on the same date each year. These are so useful.

Monday, January 19, 2015

Boxes, Bags, and Tags class Saturday

A short interruption in The Perpetual Calendar posts. This is one of two projects we will be making this Saturday, January 24 at 10am. It uses the Hearts framelits and the new Designer Paper from the Occasions catalog. There is space available. See you Saturday.

Sunday, January 18, 2015

The Perpetual Calendar - April

This is the header of the April page for The Perpetual Calendar kit.

Saturday, January 17, 2015

The Perpetual Calendar - March

The March page for The Perpetual Calendar.

Friday, January 16, 2015

Thursday, January 15, 2015

The Perpetual Birthday Calendar - January

This is the January page. You will notice my note. I took the pages and back board and used my Bind-It-All to hold them together. What I didn't do, however, is make sure the days of the months were correct. Hence the note to remind my ladies to make sure everything is in the correct order before we bind them. The little gold circles were punched with the 1/4" circle punch out of the scrap gold glitter paper from the kit. The sequins are from the string of sequins included in the kit. I just eased some off the end.

Wednesday, January 14, 2015

The Perpetual Birthday Calendar Kit

My speciality class for January is this coming Saturday, January 17, 2015. We used the Simply Created Perpetual Birthday Calendar kit.(137950 $15.95) The stamp sets I'm using are: Project Life Day to Day (135785 $25.95), Gorgeous Grunge Clear (130517 $17.95), Perpetual Birthday Calendar (137167 $23.95). I'm using various ink colors and punches. Email with any questions. You can order any of the above Calendar kits and stamp set until March 31, 2015. Today's picture is the label for the box that you include your calendar in for a gift. Such a cute project. During the next 12 days I'll post a picture of the month page.

Tuesday, January 13, 2015

Another card from a friend

This is another card by Holly. Love her designs.

Monday, January 12, 2015

Gift from a great friend

Since I've been showing calendars lately I'm showing you a gift I received from my friend Holly, from Rubber Redneck, in a holiday package. She is such a talented stamper.

Sunday, January 11, 2015

Calendar for orders

This is the calendar (colors will vary) I'm sending to customers who place a $150 order during Sale-a-bration. By placing your $150 order you will receive hostess benefits and 3 FREE Sale-a-Bration items of your choice. Contact me today.

Saturday, January 10, 2015

Desktop Calendars

This is the original I did MANY years ago. I'm making coaster calendars. I'm using up old DSP and will post the finished projects tomorrow. Would you like one of these desktop calendars? Simply place a $150 order during Sale-a-bration and it's yours!! Colors will vary.

Friday, January 9, 2015

Lotus Blossom - FREE during Sale-a-Bration (for a $50 order)

Brenda over at Qbees Quest shared this template for showing the different color combinations using the Lotus Blossom stamp set. You can receive this stamp set FREE for a $50 order during Sale-a-Bration. We will be using this stamp set for all parties during January through March. Love this stamp set alot!!!

Thursday, January 8, 2015

Love the Curvy Keepsake framelit

Love love love the Curvy Keepsake framelit. I made this one using our cardstock vellum. I used versamark and the snowflake stamp from the Project Life set and heat embossed it in gold. The tags are from the Curvy Keepsake framelit. Did I say I love this framelit.

Wednesday, January 7, 2015

2 more specials during Sale-A-Bration

I want to tell you about 2 more specials during Sale-A-Bration January 6th through March 31st 2015. Join Stampin'Up! now for just $99 and receive a starter kit with products valued at $125. Plus during Sale-A-Bration, you get to choose two FREE options: Option #1-Choose a free projectkit from the occasions catalog. These kits are the perfect way to get started as a demonstrator - lots of fun with minimal preparation. Option #2 - Choose any two Sale-A-Bration items. It's the perfect chance to get the products that you wanted anyway. Have fun making projects - and money! The second special is: Host a party and earn $25 more in host dollars with $250 or more in sales.

Tuesday, January 6, 2015

Occasions and Sale-A-Bration are here!!

The Occasions Catalog is here! Available from January 6- June 2, 2015. Fantastic new products you will love to create with. Sale-A-Bration also begins today through March 31, 2015. For every $50 you order from the Occasions or Inspire, Create, Share catalogs you receive 1 FREE items from the SAB catalog. No limit!! Plan your party today to earn even more.

Monday, January 5, 2015

January Stamp of the Month Kit

Included in your kit. All cardstock, designer paper (patterns may vary), and ribbon precut for all 5 cards shown in picture. This kit has two creative fold cards All Envelopes All other punching and cutting will be done for you. Supplies used were: Heart Border Punch, Arrows Embossing Folder, Hearts A Flutter Framelits, Bitty Banners Framelits, Stacked With Love Designer Paper PDF file with measurements sent by e-mail plus videos when available For this kit you need the stamp set and punch, if you already have stamp set or punch, you can always choose another set or punch of the same value. I do not sell the PDF file. The ink pad colors I used were Classic Real Red and Memento Black. If you do not have these colors, you can substitute with colors you have or order them at the same time you order the kit, just let me know in your e-mail. No Rhinestones, pearls, dazzling details, or acrylic blocks are included in kit. Cost of the Kit: Supplies with Groovy Love Stamp Set in Wood with Sweetheart Punch $60.00 Supplies with Groovy Love Stamp Set in Clear with Sweetheart Punch $53.00 Purchase two or more kits at the same time and get a 10% discount. Please note these kits can only be shipped to the US, this is Stampin’ Up!’s policy.

Sunday, January 4, 2015

Get Well

Love the red and white mixture. Real Red and Whisper White. Real Red cotton ribbon. Mixed Bunch, Flower Shop, and Petite Petals stamp sets and matching punches. Simple, simple, simple.

Saturday, January 3, 2015

Surprise opening

When your lucky receiver opens this card there will be a surprise. It ships flat but opens to show a hidden window with your sentiment. I found the directions for this card on Julie Davidson's blog and changed up the colors and sayings. I used the Sunburst stamp set and framelits. Love the spring colors.

Friday, January 2, 2015

Card and Envelope all in one

Today's card is a self contained card. I used the Envelope Punch Board to create the A2 card. I stamped the outside flaps and the inside piece. It is held together with a belly band but if I were to mail it I would use a glue dot to hold the flap closed. The back is left blank to write the address. Easy and cute.

Thursday, January 1, 2015

Promise to do better in 2015

Happy New Year everyone. I can't believe I haven't posted since December 5th. I am sorry about that. I promise to do better in 2015. My goal is to make something each day and share it with you. Please follow me on my journey to be a better poster.

LinkWithin

Related Posts with Thumbnails